As of recently, I quite often receive Excel files with hundreds of IPs which need to be geolocated (Can you guess where they come from?). Sure, I could import them into our Elastic stack, but would that post then be titled “Dirty”?
So we need to come up with a different solution. While researching the topic, the first thing that became clear was that I need an offline solution. Although most of the time I just try to locate a handful of addresses, but this sometimes explodes to up to 5.000. In that case, it is almost impossible to find a suitable web API. The most generous free services only provide up to 1.000 lookups per week.
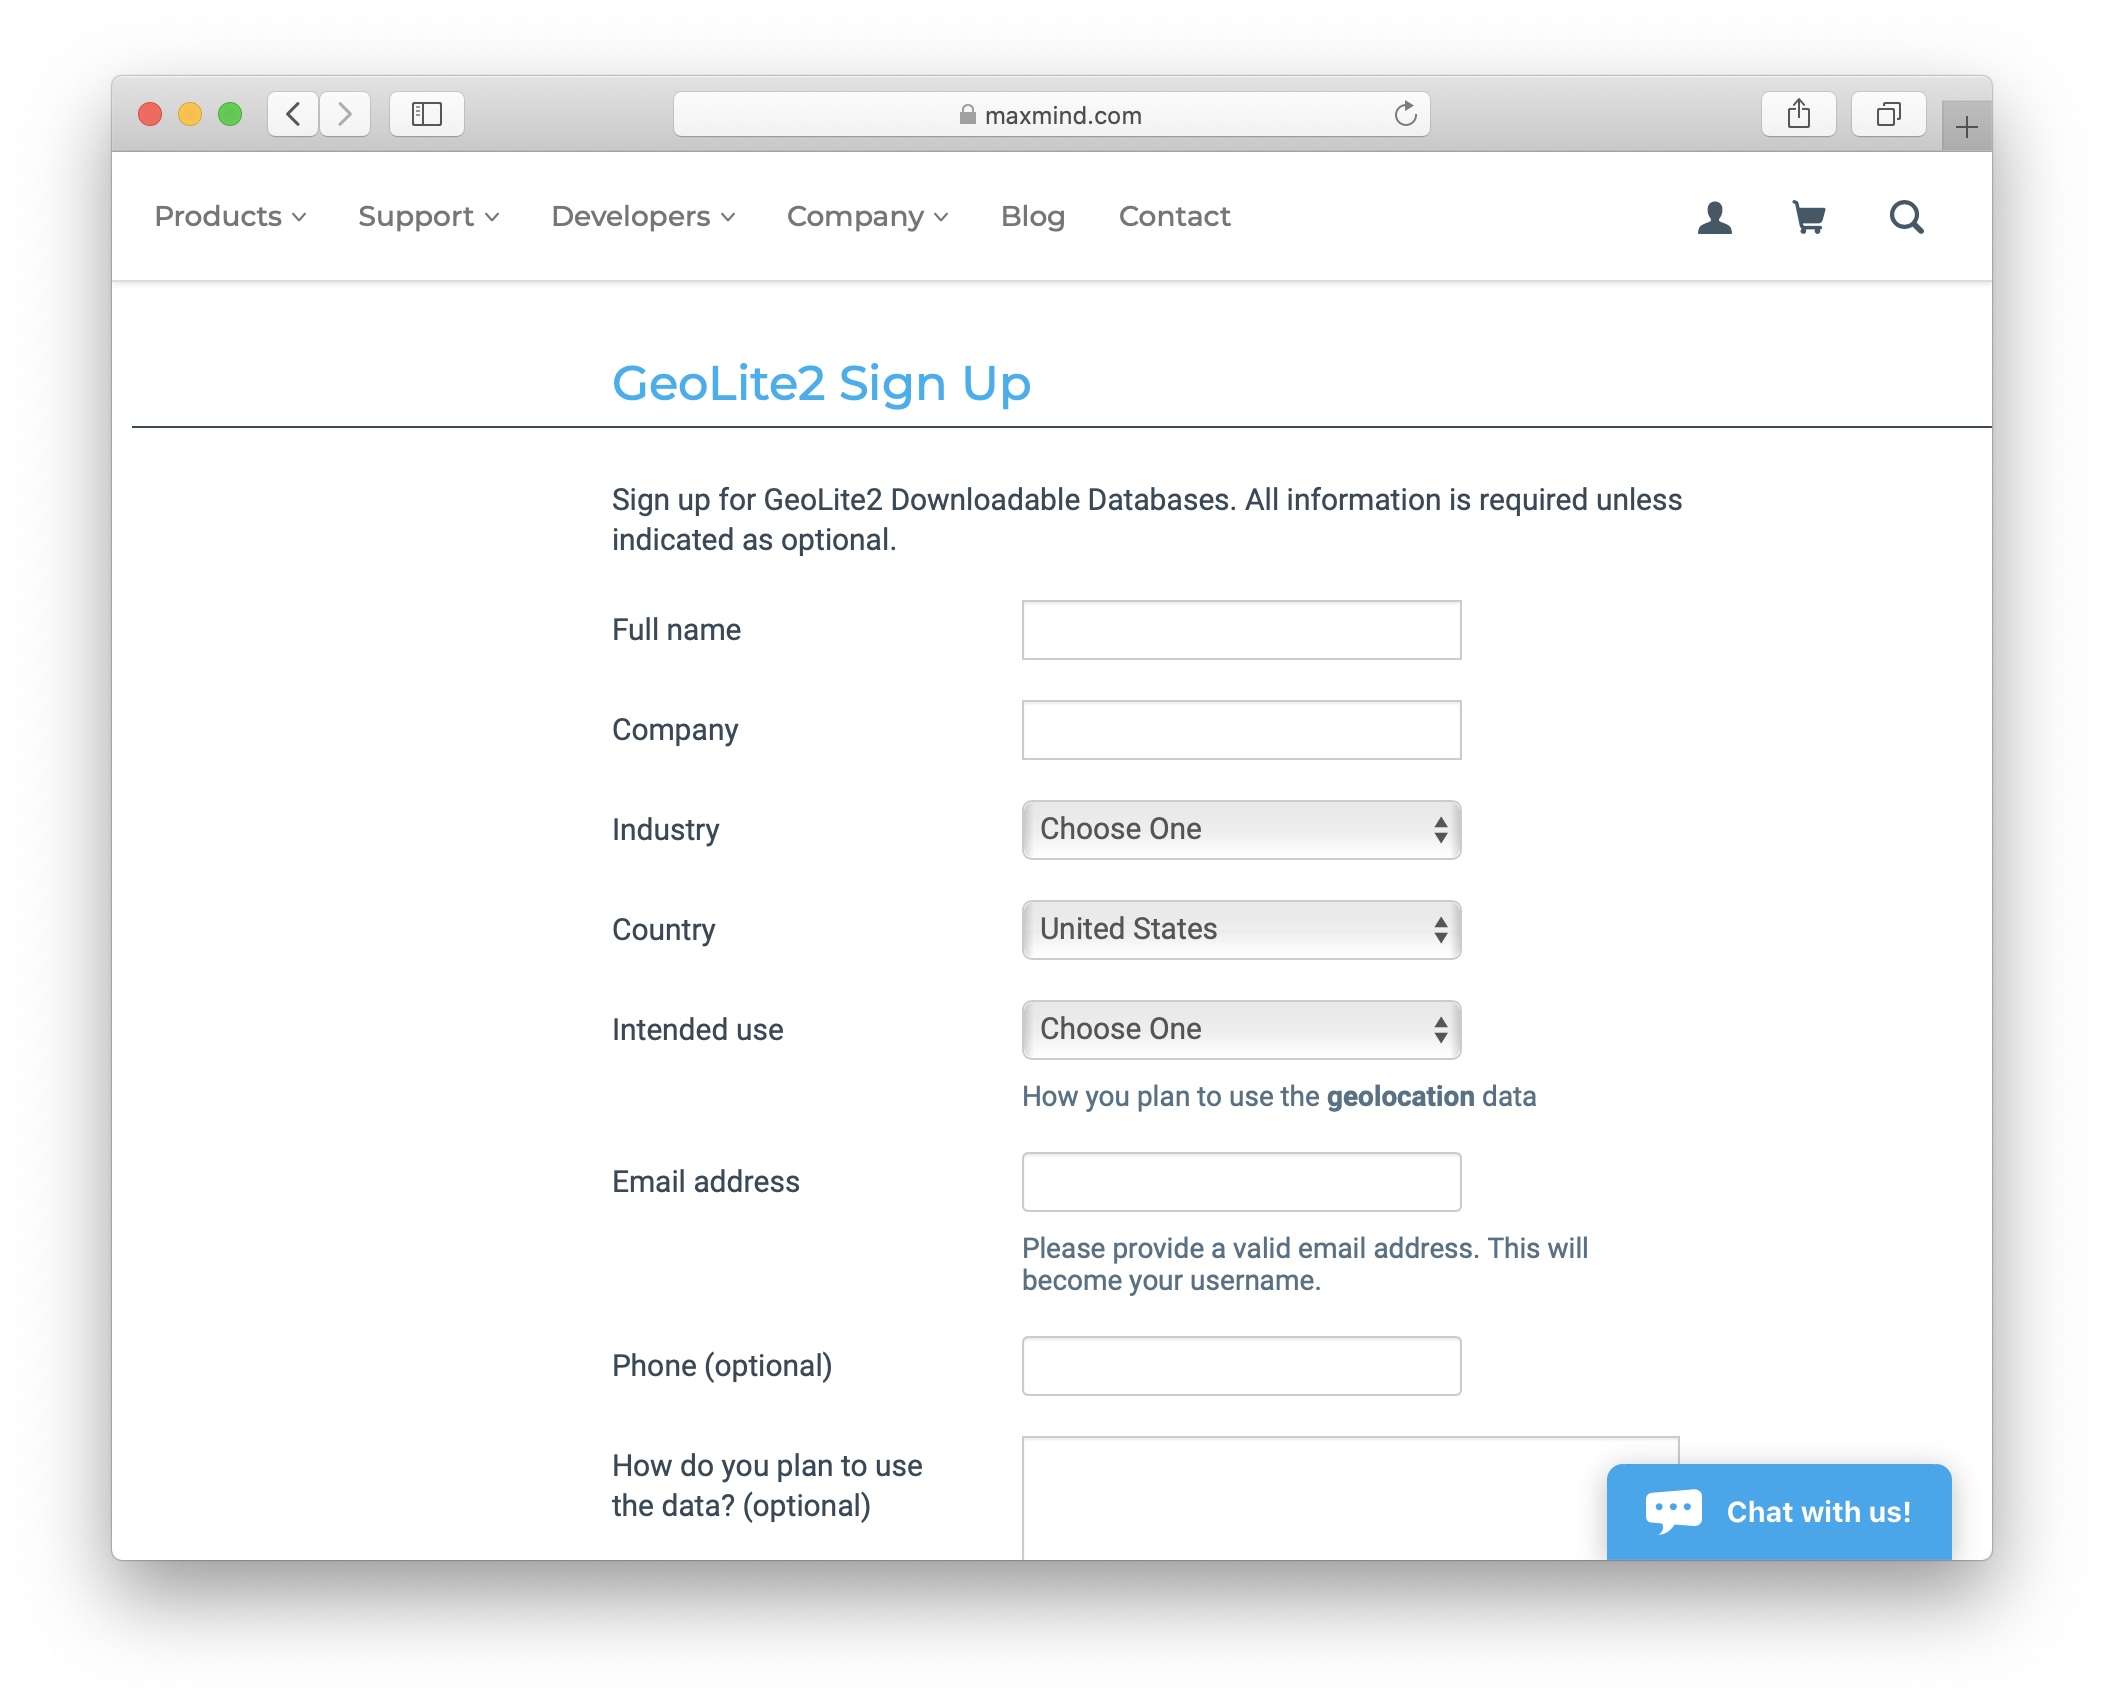
Luckily there is MaxMind. They are the company behind GeoIP, which also offers a free offline database. Simple register for an account on their website.
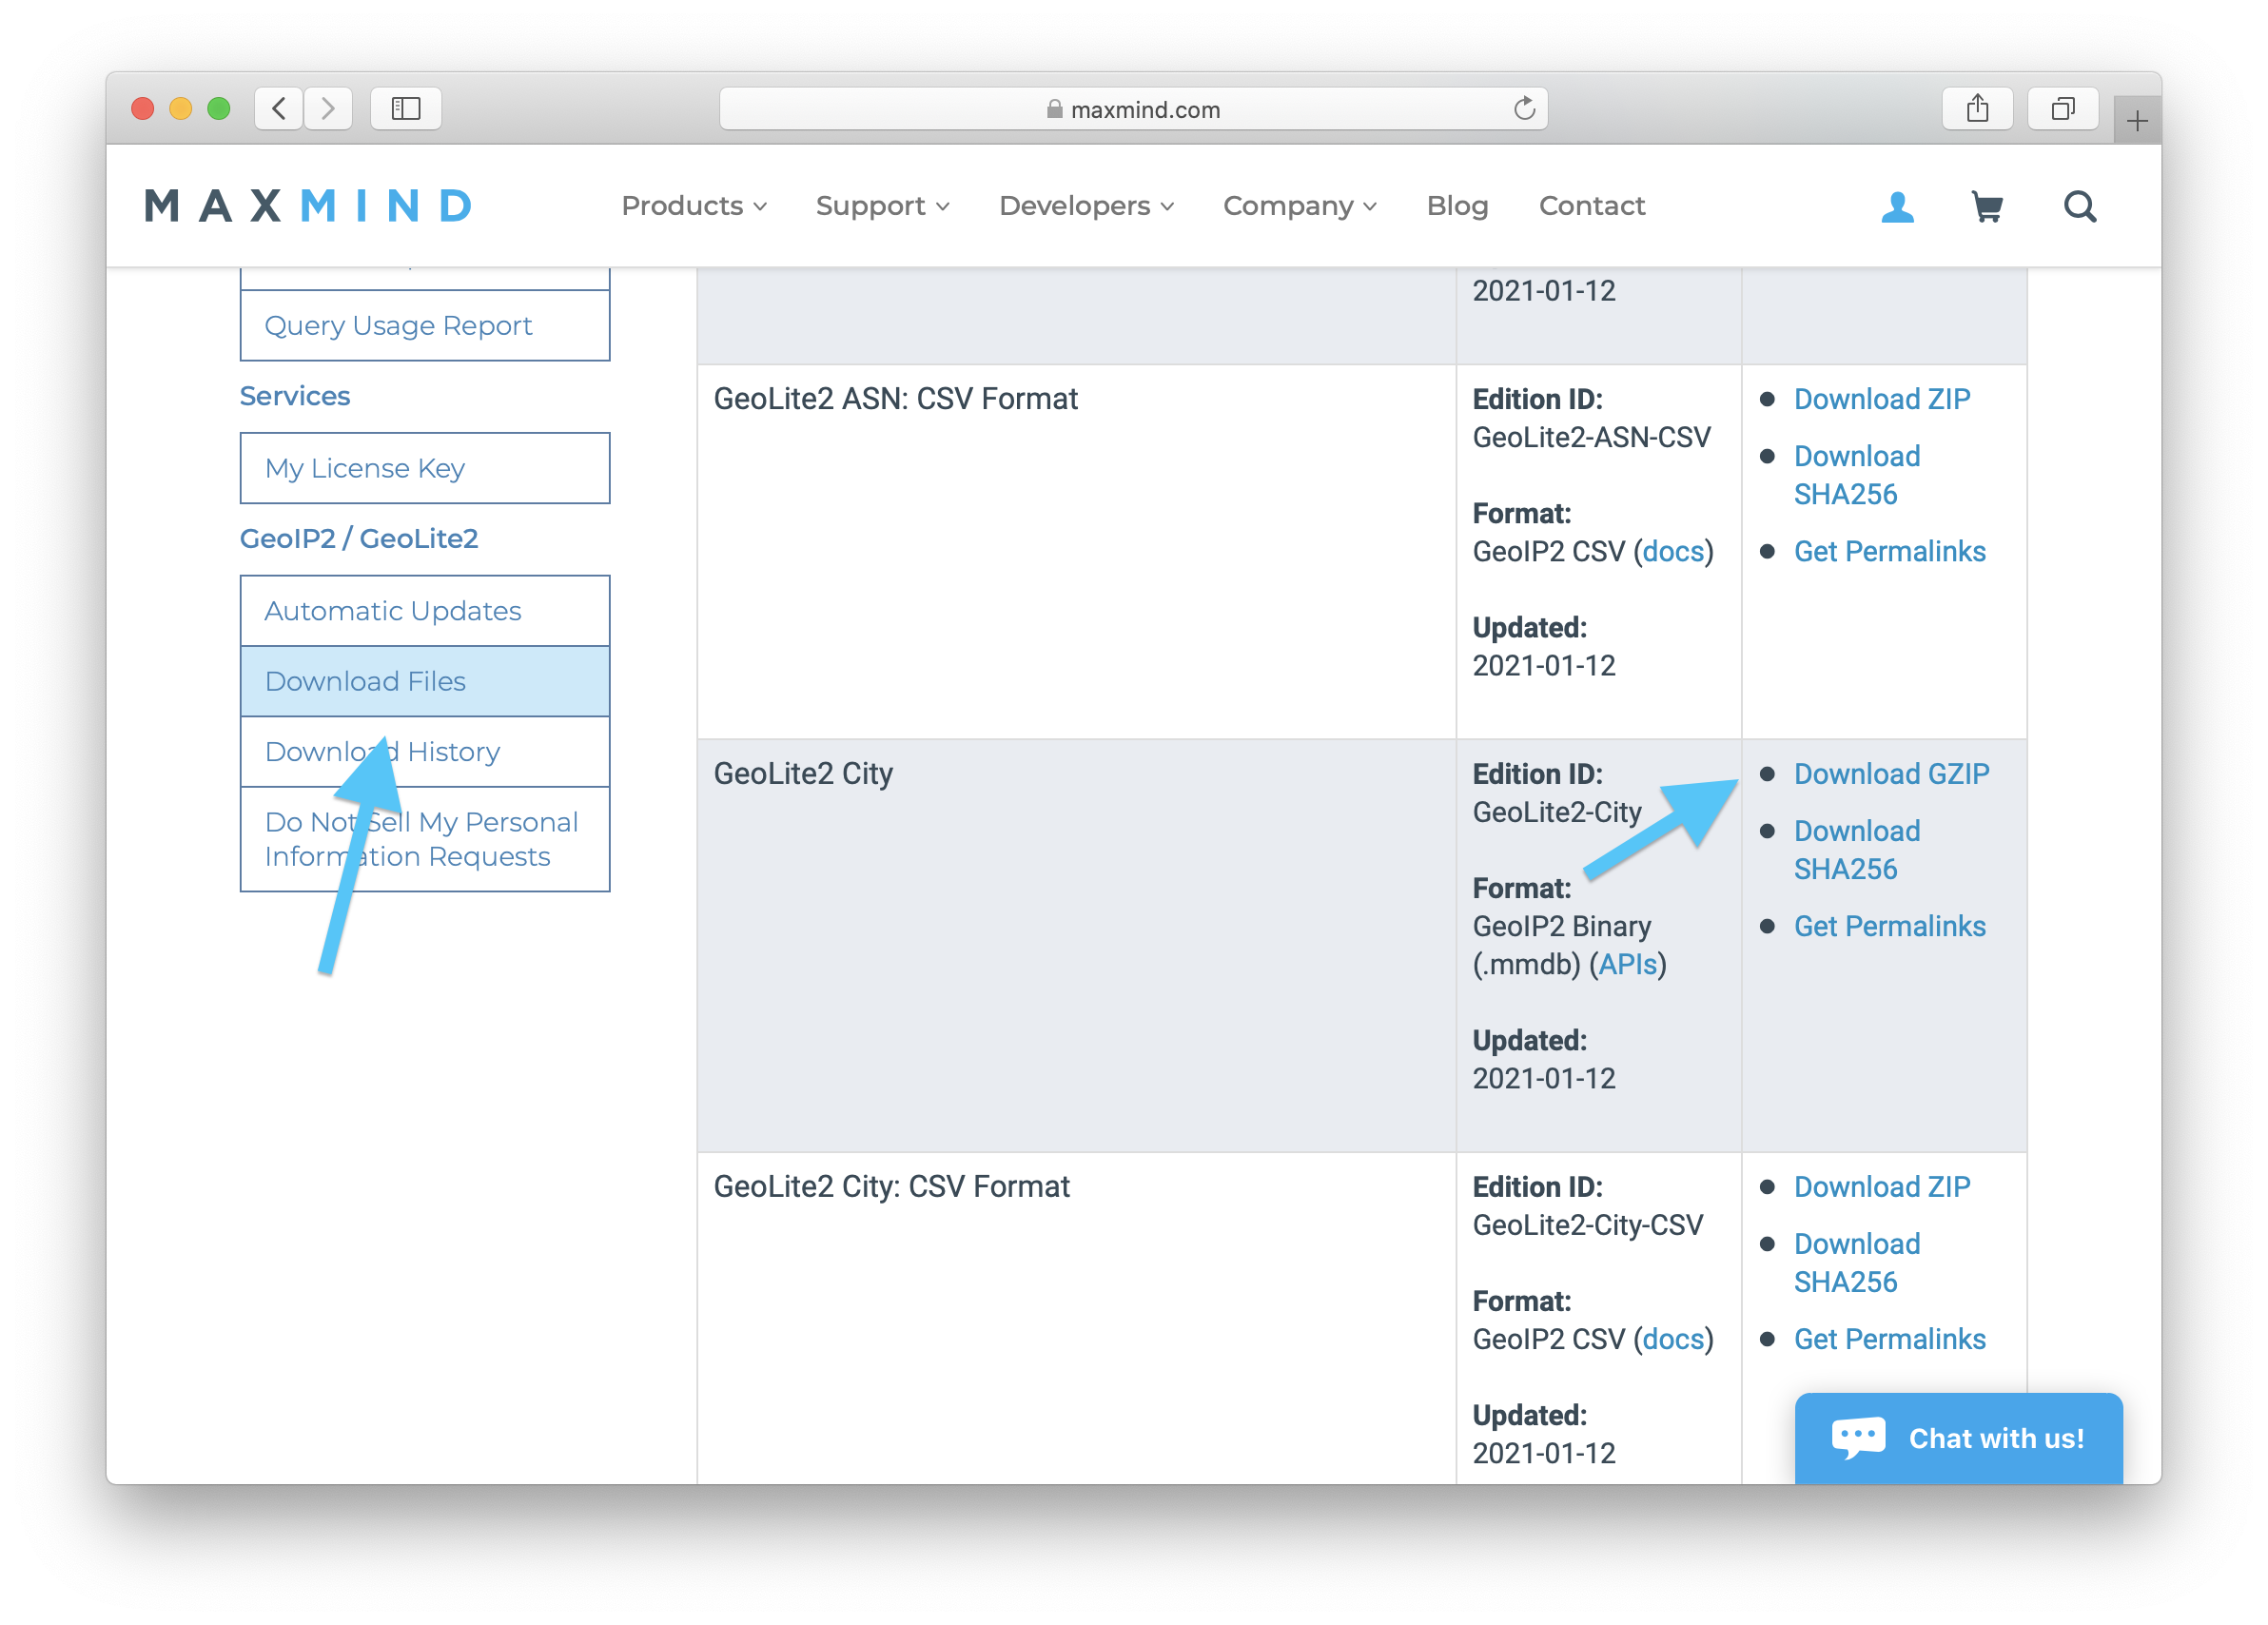
Then access your account and select “Download Files” in the left menu. From the list, select the “GeoLite2 City” database file. It’s important to use the GeoIP2 Binary format.
Finally, it’s time to get dirty: Download the script dirtyiplocate.py from Github or clone the whole repository. After that, the geoip2 modules needs to be installed (pip install geoip2).
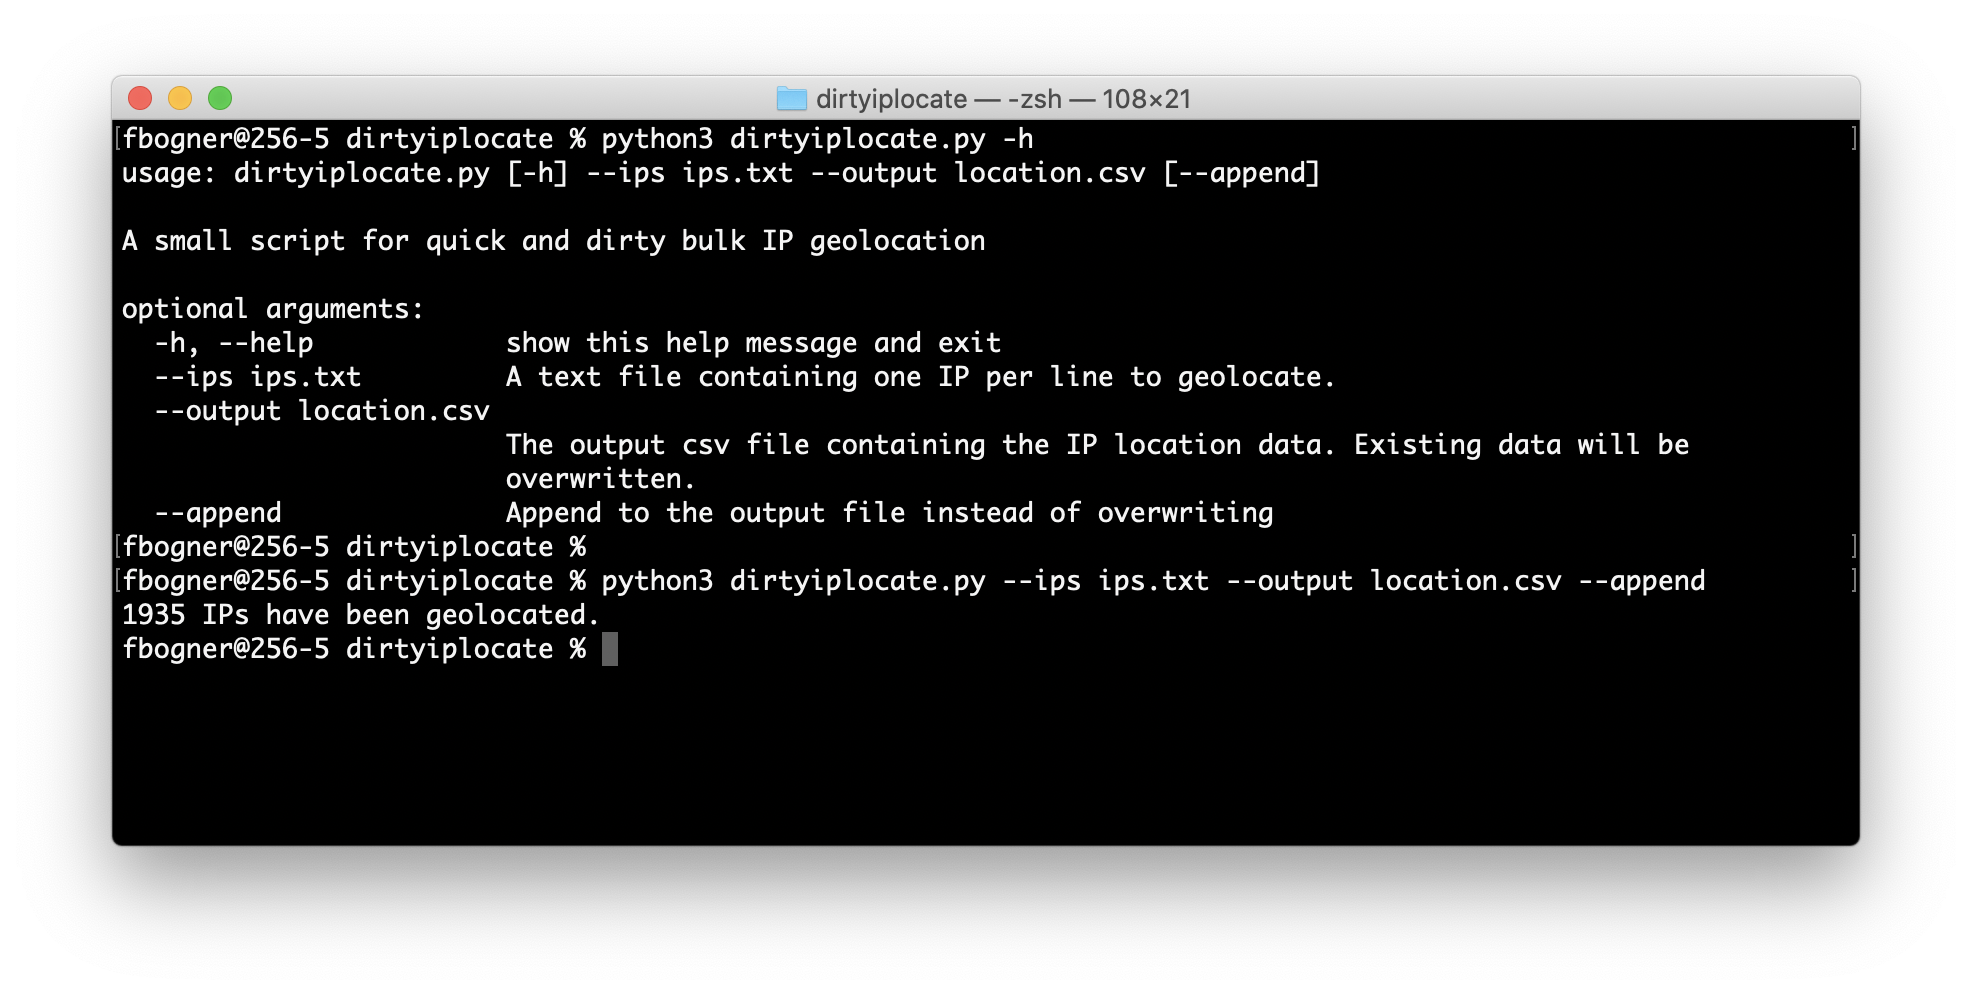
After all that hard work, dirtyiplocate.py is ready to rumble. As shown in the following screenshot it’s pretty easy to use. Provide a text file with IPs you want to locate (the –ips argument) and specify the output CSV file (the –output parameter). In case you want the results to be appended to the output file instead of overwriting it, the –append argument can be used.
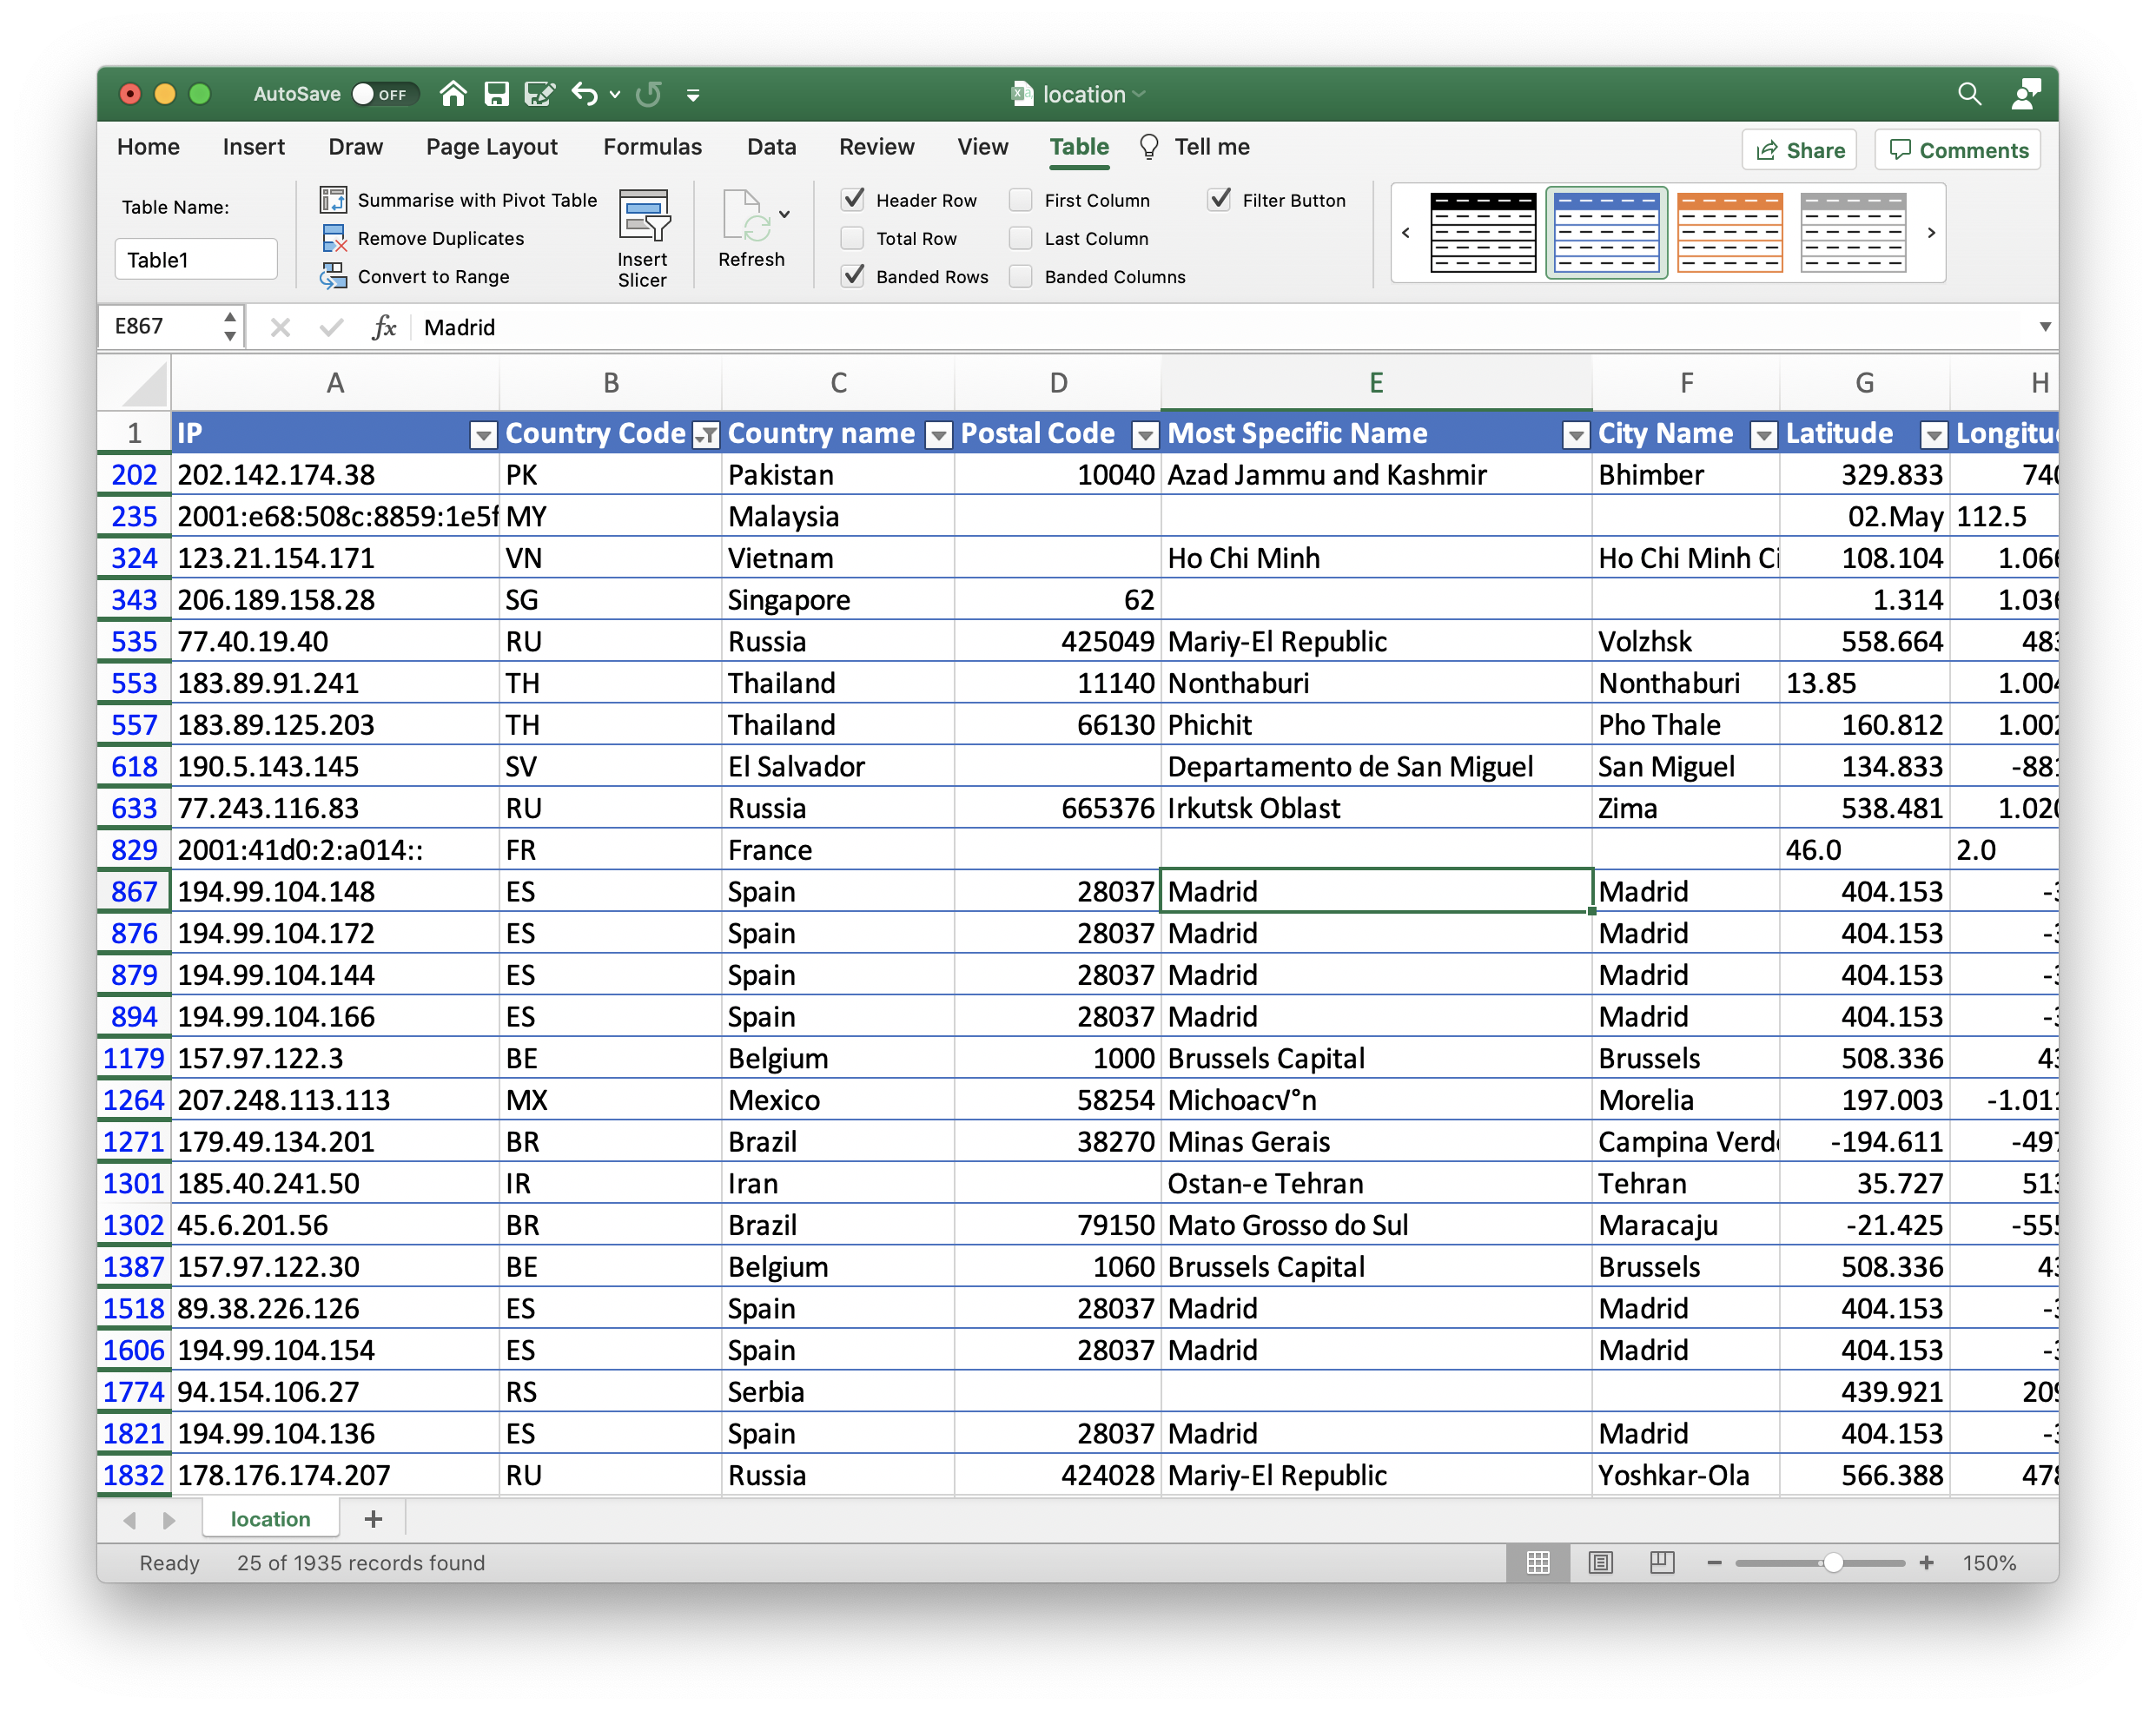
The following screenshot shows the output of dirtyiplocate.py. Excel’s VLOOKUP can now be used to incorporate this data into existing lists. Please always use the datatype TEXT for IP addresses. Otherwise a unicorn dies!
For my daily work as a pentester and especially during my recently taken OSCP exam PortSwigger’s Burp Suite was and still is an invaluable tool. Beside many other things it allows one to intercept web traffic between one’s browser and a web server. Thereby web request can be reviewed or even modified. You can check out the homepage for more details.
However, under OS X there are two quirks that drive me crazy. Both are not directly related to Burp itself, but to the fact that it is distributed as a Java Archive (jar).
The first is, JARs are simply not considered first-class applications any more. That means they can’t be pinned to the Dock (the part to the right of the spacer simply does not count!) and they are categorized not as Applications but within the Developer section.
The second issue is that the generic JAR icon is used. As I’m often running more than one Java process it is impossible to differ them only from looking at the Dock.
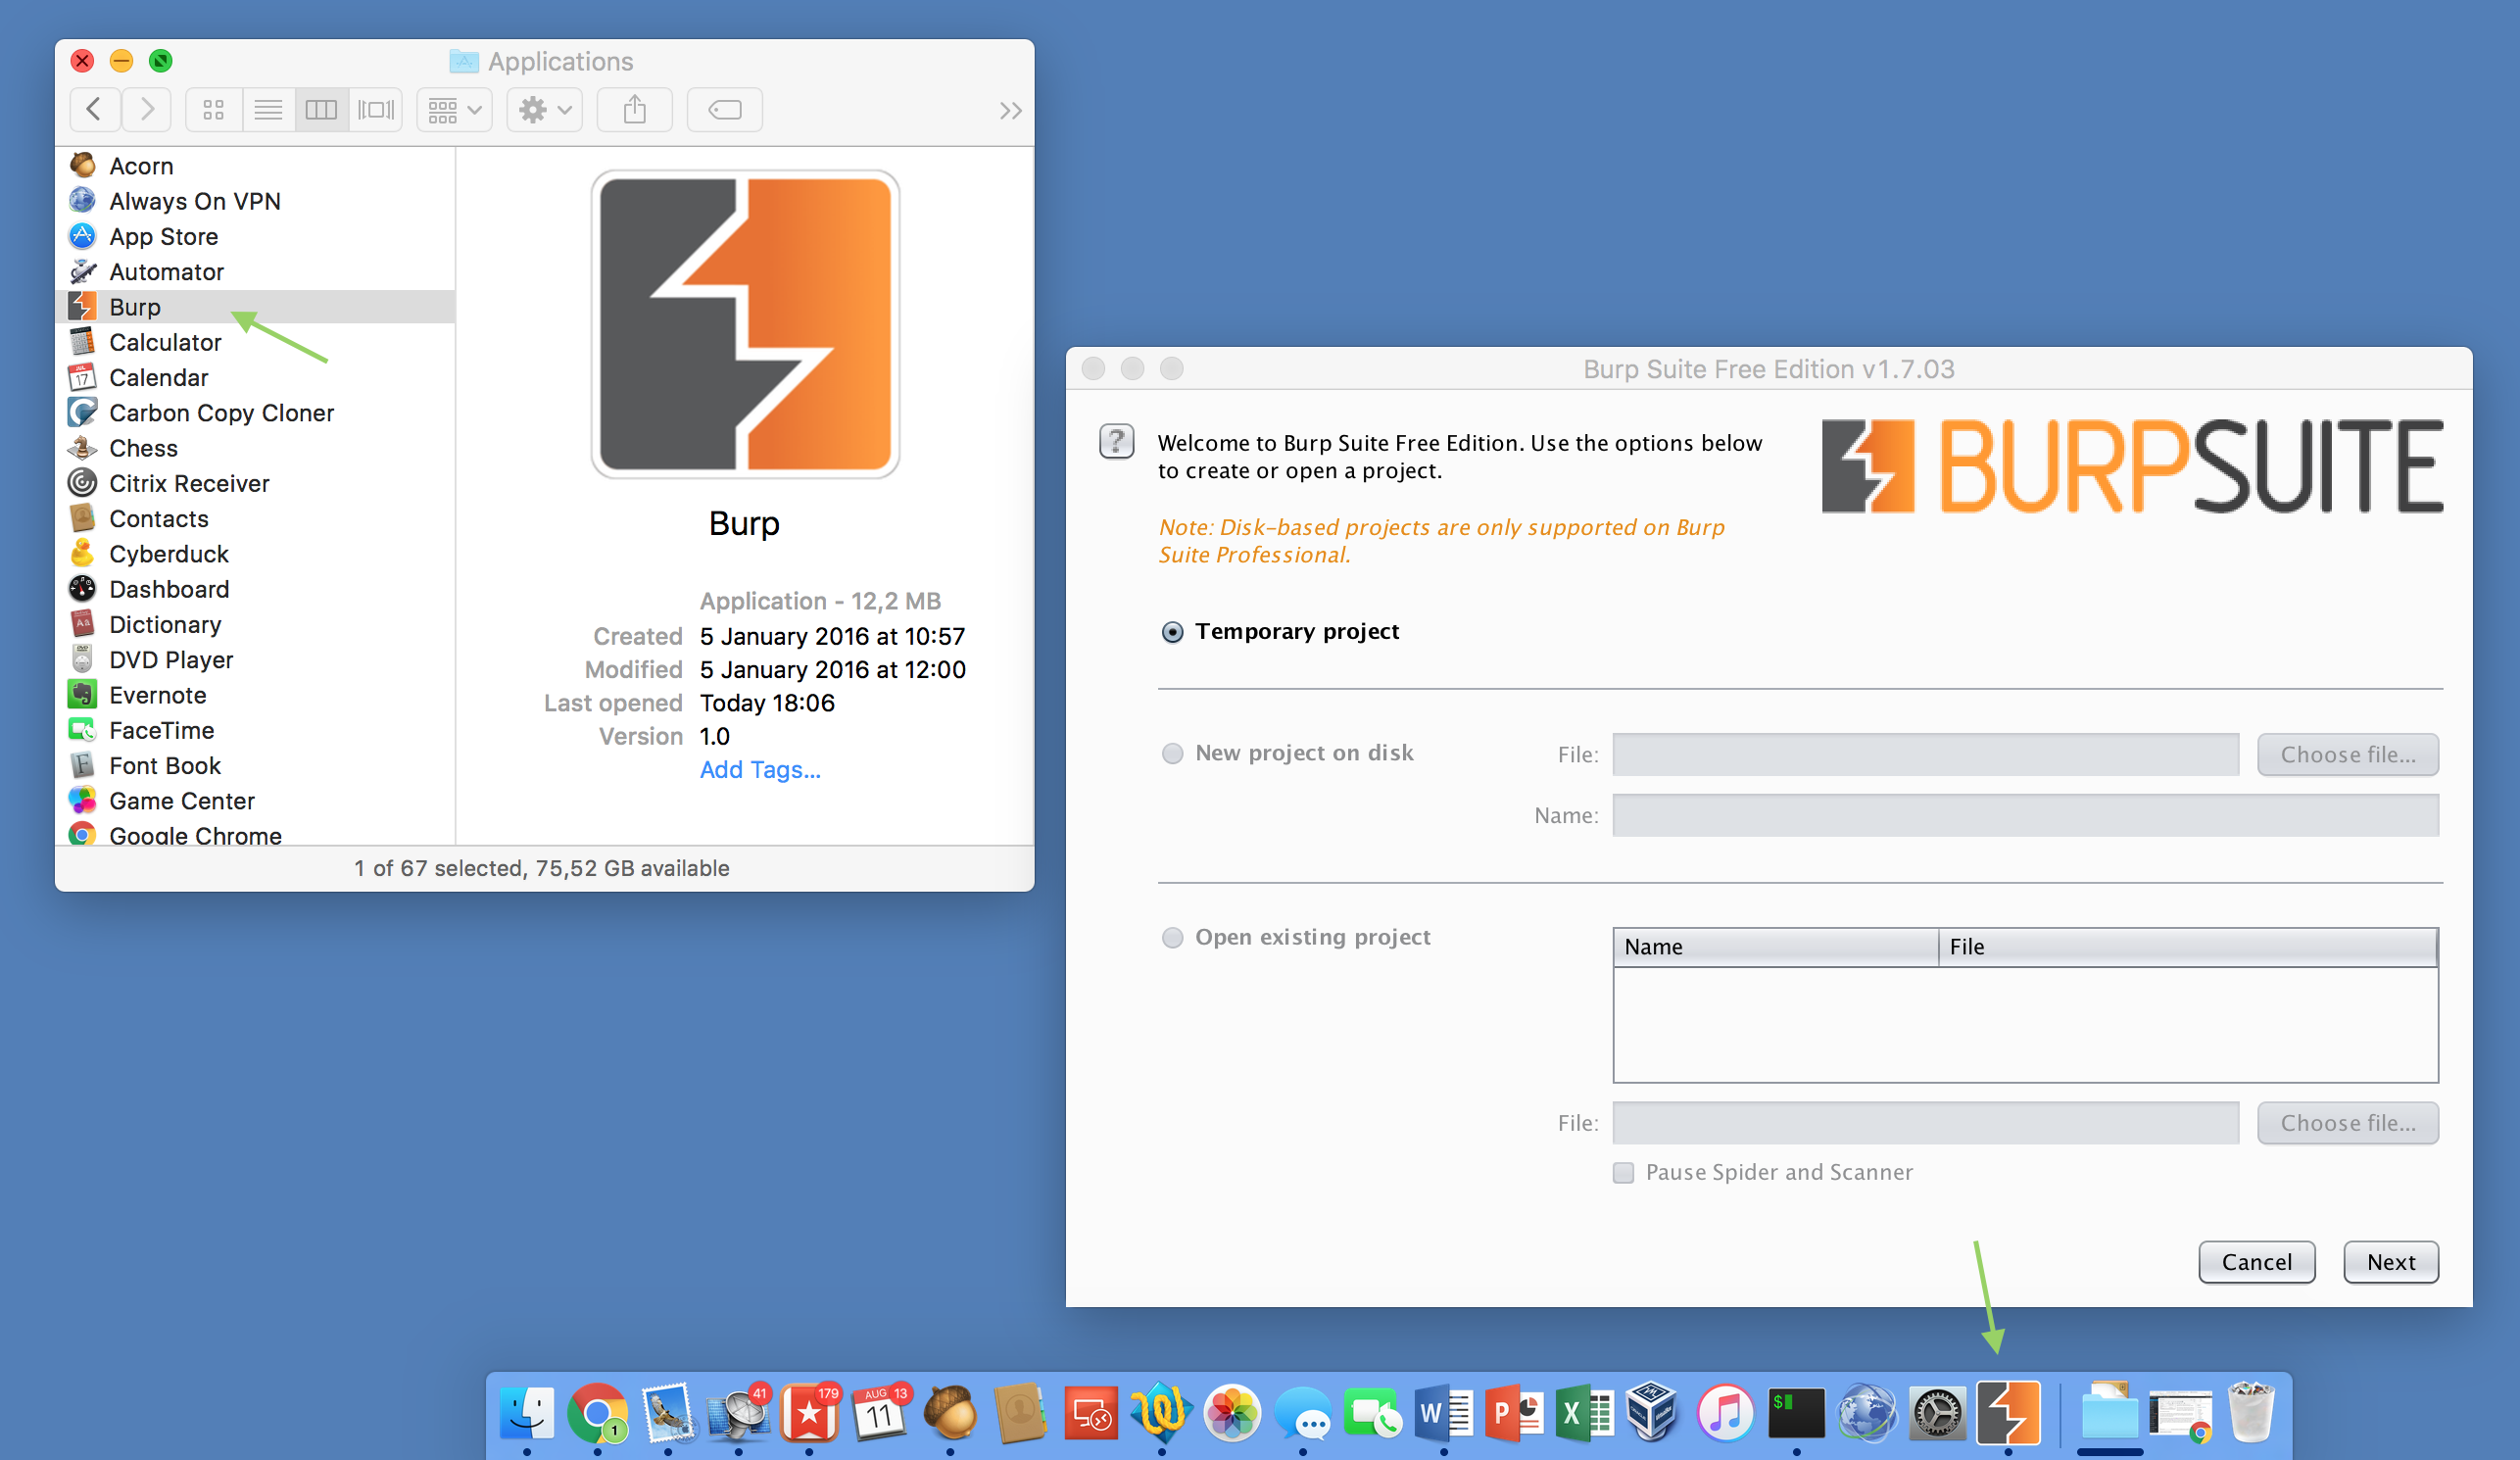
To fix this issues I built Burp.app: A small AppleScript wrapper around the original Burp Java Archive. It smells, feels and behaves more like a native OS X application but still runs the unmodified JAR in the background.
Simply download the latest version from Github and put it into the Applications folder. Then download the lastest available Burp version and drop it onto Burp.app. Thereby this version is wrapped into the application. This process can also be used to update the currently wrapped version. After that you can delete the JAR and enjoy your new OS X version of Burp.
The following screenshot shows Burp.app in fully glory.
I already actively used Burp.app for more than a year. However, if you encounter any bugs or if you have any suggestions just let me know using the comments below.
In the need for a simple and easy to use OS X based Always On VPN solution? If so, I may have something for you.
We are using a straight forward L2TP over IPSec VPN connection for connecting into our Pentesting lab. Beside giving me access to many of my most needed tools it also allows me to surf the web without any proxy or firewall limitation. As I encountered several VPN disconnects over my work day I decided to solve it once an forever by automatically reconnecting the VPN after a dropout.
global PING_HOST
global VPN_NAME

set PING_HOST to "vpn.example.com" # A host on the web to ensure the current connection is working at all
set VPN_NAME to "Your VPN" # The name of the VPN connection to dial (works with PPTP, L2TP over IPSec and Cisco IPSec)

on idle

	try
		# as the ping causes an exception if no response is received we only try to connect to the server if it's really reachable and thereby surpress error messages
		do shell script "ping -c 1 -W 500 " & PING_HOST

		tell application "System Events"
			tell current location of network preferences
				set myConnection to the service VPN_NAME
				if myConnection is not null then
					if current configuration of myConnection is not connected then
						connect myConnection
					end if
				end if
			end tell
		end tell

	end try

	return 2 # schedule to run again in two seconds
end idle
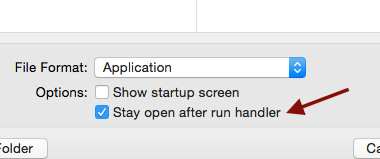
Simply save it as an application and check the box “Stay open after run handler”:
As long as the App it is running, your VPN connection will be redialed automatically. This small helper gained a permanent spot in my Dock!
PS: To give the App a nicer appearance you may want to change it’s icon to this free one. Here is a tutorial on how to do that.
Edit: Updated the code to use the “on idle” handler
Today I want to introduce a small helper tool, namely lsdns. I wrote it as I always struggle to find the correct IP and hostname mappings while writing my pentest reports. lsdns is a small python script that queries a DNS server for a given IP range and outputs the results in a CSV compatible format. In this post I will explain why it is useful to me, where you can get it and how to use it. All our pentest reports document the found vulnerabilities, possible mitigation strategies and logically list all affected systems. To help our customers we always try to provide both, the IP address and the corresponding hostname for any computer mentioned. Although this is generally quite easy, it can be quite a pain if you can not access the original DNS server while documenting the findings either because it is only available from the internal company network (and you did not find a vulnerability that allows you to query it externally) or split DNS is used.
To at least partially solve this issue for me I wrote lsdns. It is a small application that uses reverse DNS to get all hostnames for a given IP range. The output can be redirected to a CSV file and can be used while writing the report to look up either the hostname or the IP address of a vulnerable system.
Installation
To install it you need to have python2 and the python setuptools already preinstalled. Then you can either clone the git repository or simply download the latest ZIP from GitHub. Before you can use it you have to manually install the dependencies from within the dependencies folder by running the corresponding setup.py scripts. After that you are ready to go.
Usage
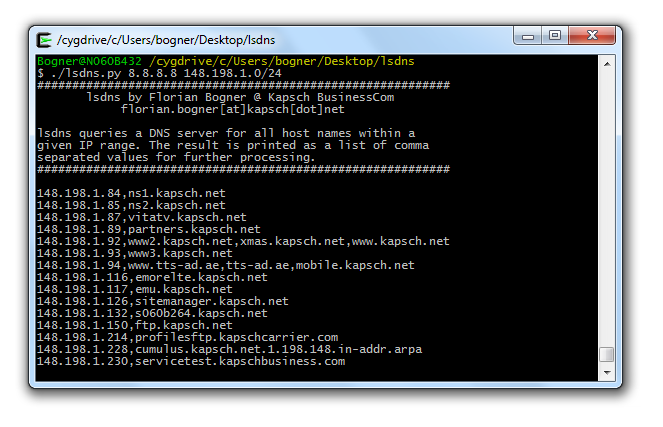
dnsls is a very simple to use command line utility. The following example shows how to do so:
./lsdns.py <dns server to query> <IP address or range>
Example: ./lsdns.py 8.8.8.8 148.198.1.0/24
By redirecting stdout to a file a valid CSV file is created. To still give you feedback about the progress a dot is printed for each host. A sample is available here.
I hope someone else also sees a value in dnsls. If so, it is freely available for you under the terms of the MIT licence.
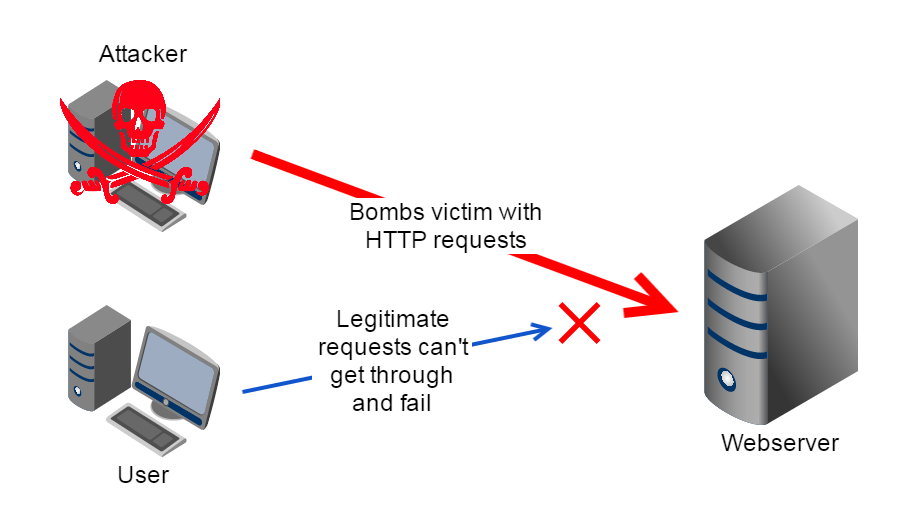
Recently our team was tasked with creating a demo to illustrate the effects of Denial of Service (DoS) attacks. As I was particularly interested in how the available attack tools work I studied the sourcecode of one of them – the Low Orbit Ion Cannon. In this post is will cover the surpising simplicity of the implementation. However to get a context let’s start first with discussing how DoS attacks generally work, illustrated on the basis of the following setup:
In our simple demo network there are only three participants: A central webserver as victim, a legitimate user that wants to connect to the webserver and an attacker. In the beginning the legitimate user can browse the webpage hosted on the webserver smoothly. However as soon as the attacker starts his DoS attack the legitimate user’s requests either take very long to finish or even fail completely. This instability is caused by the attack overloading either the webserver’s connection or the server process itself.
One tool an attacker could use for these kind of attack is the free and open source Low Orbit Ion Cannon. It is a very easy to use application with a nice graphical user interface. The video embedded below contains a short walk though.
Now let’s get our hands dirty: To find out how the application attacks the victim’s server in detail we have to download and analyse the source. Below is a cleaned up and simplified version of the method responsible for carrying out the actual HTTP Denial of Service attack.
byte[] buf = System.Text.Encoding.ASCII.GetBytes(String.Format("GET {0} HTTP/1.0{1}{1}{1}", Subsite, Environment.NewLine));
var host = new IPEndPoint(System.Net.IPAddress.Parse(IP), Port);

while (this.IsFlooding) {
	byte[] recvBuf = new byte[64];
	var socket = new Socket(AddressFamily.InterNetwork, SocketType.Stream, ProtocolType.Tcp);

	socket.Connect(host);
	socket.Send(buf, SocketFlags.None);

	socket.Receive(recvBuf, 64, SocketFlags.None);
}
To my surprise the method was a lot shorter and less complex than I expected. I will now try to walk you trough the functionality so that you also understand what is going on even if you are not a developer .
In the first two lines the application prepares the attack’s underlying HTTP request and sets the target IP address and the target port. Although it’s done in an rather unusual way it’s a legitimate implementation for an application requesting data from an external HTTP service. In the following third line the while command tells the system to repeat all enclosed and indented further commands. Within this section the actual attack is launched. However to do so two more things need to be prepared: At first in line 5 a buffer called recvBuf is created that is used to store the subsequential answer from the victim and in line 6 further connection details like the use of the TCP protocol are specified. Finally in line 8 the network connection to the victim’s server is established and in line 9 the HTTP request that was created in the beginning is sent. The subsequent receive method call in line 10 stores the first 64 byte of the server’s reply in the previously created receive buffer recvBuf. This forces the application to wait for the server to reply before it moves on. Until now we behaved like a normal web browser. However as the last command within the while loop was reached the whole process beginning at line 5 is repeated. Again and again and again …
What that means is we didn’t really use any service and just created unnecessary load on the server and the network connection. As the attack requests are generally repeated as fast as possible and are executed in parallel this load can render services unusable or even bring them down completely. This is especially true for Distributed Denial of Service (DDoS) attacks where many attackers or their bots join forces to attack a target as happend to the Playstation Network in 2014.
To recap: The sourcecode contains no nasty little tricks or algorithms that require any special knowledge. That means you don’t need to be a genius to write an effective and widely used Denial of Service attack tool. For me that is somewhat frightening!
If you are responsible for keeping systems up and running it’s important to keep an eye on your hardware. This especially denotes to hard disks, fans and power supplies as they break most often. Today’s post is about how to easily and automatically check the state of power supplies.
To do so I wrote a small script that uses ipmitool to check the state of all detected power supplies. I used it primarily on Supermicro X9 class motherboards however all systems supported by ipmitool should work.
The USPs of my script are that it supports more than two power supplies, that it is fully documented and that it reports a unique exit code per system state. All this features help you to integrate it perfectly into your workflow. Here’s how to use it:
$ ./checkPowerSupplies.sh -h
This tool checks the state of all installed power supplies and reports their current state. It can be used in automated monitoring tools like nagios.
It depends on ipmitool and supports all systems that report the state of the installed power supplies through the sensors subcommand. I used it primarily on Supermicro X9 class motherboards.

Usage: ./checkPowerSupplies.sh
	-h 	Shows this help
	-p=2	The number of expected power supplies
	-r=0x1	The value that indicates a working power supply (see ipmitool sensors)

Example:
./checkPowerSupplies.sh -p=3 	# Check 3 installed power supplies
./checkPowerSupplies.sh		# Check 2 installed power supplies
./checkPowerSupplies.sh -r=0x4	# A working power supply reports a state of 0x4

Exit codes:
	0	All power supplies are working
	1	ipmitool is not installed
	2	Found more power supplies than expected
	3	At least one power supply is missing
	4	At least one power supply failed

Version 1 released in 2014 by Florian Bogner - http://bogner.sh
If you are interested you can download the checkPowerSupplies.sh script over at Google Code.
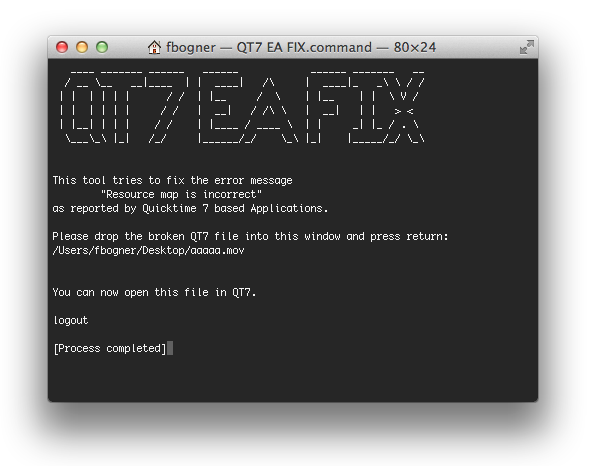
Over the last few years I encountered the following QuickTime 7 error message several times while trying to play a file:
The cause of this message is a broken Resource Fork which is stored within the file’s extended attributes. This error often occurs if the file is or was stored on a network drive or an external disc. It also affect all applications that build upon QuickTime 7’s API. To verify if a file is unplayable because of it’s Resource Fork just try to play it with VLC. It should work fine. If so, it can be fixed.
To make it easy to repair such files I wrote QT7 EA FIX. Just launch the script and drop the broken file. The rest will be handled automatically and you should be able to play the file afterwards.
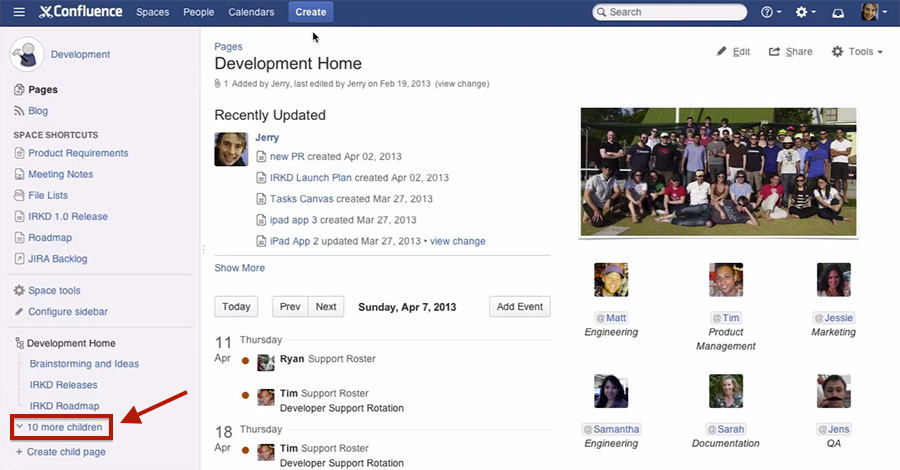
We are using Confluence as our internal documentation platform. It’s a gorgeous tool that really helped to bring our documentation to the next level. There is only one thing that I dislike about it: The show “X more child pages” link in the sidebar. I highlighted the troublemaker in the picture below that I captured from one of Atlassian’s demo videos.
Tired of all the complex solutions? found on Google I created a simple Tampermonkey userscript that automatically clicks the link if present. It is inserted into all pages that contain the keyword confluence in the URL and checks if it’s really a Confluence page. If so, it clicks the “X more children” link as soon as the page is ready. Thereby you immediately see all available child pages. It’s a major timesaver in my daily workflow.
Currently I’m confronted with a lot of ignorance around LTFS. This is interesting as there are some very good resources [1,2] on what LTFS is good at and what should be solved using a dedicated backup or archiving application (like Archiware P5).
If you want to use LTFS consider the following best practice rules:
LTFS is good at transporting data – Archiving is hard as there is no real index database
LTFS should be used like a WORM (Write Once Read Many) tape
The bigger the files the better as small files have a horrible performance
If you only want to access files mount the tape read only to this increases the performance
Don’t force nonsequential tape operations with things like browsing a folder in thumbnail view
Try to only access top level folders (copy those folders to or from tape)
If you still think LTFS is the right solution for you go ahead and use it! On OS X most vendors [for example: Tandberg, HP] ship the same FUSE based filesystem and a small manager application. The following video gives a not so short introduction on how to use it:
Think about the following rather unusual scenario: You own a current generation MacBook Air and a new iMac that you don’t use. This blog post will show you how you can use the iMac as a pure monitor without any manual intervention.
Introduction
The current generation iMacs (21″ and 27″) can be used as a Thunderbolt display using Target Display Mode. To enabled this mode you have to boot both Macs and connect them using a Thunderbolt cable. After that you have to press [Command]+[F2] on the keyboard of the “display” iMac. Although this feature is great for rare usage – it’s not very comfortable if you want to use the iMac as a permanent secondary display.
iMacMonitor
To solve this problem I created iMacMonitor. It’s a small application running on the “display” iMac that monitors the Thunderbolt bus and automatically switches to Target Display Mode if necessary. Thereby one only has to connect the main computer to the Thunderbolt cable and a few seconds later the iMac can be used as a secondary monitor. This works because Mac’s wake from standby if a Thunderbolt device is connected. As soon as the main computer is disconnected the display will sleep again. Be aware that you should not shutdown the “display” computer as it won’t switch to Target Display Mode anymore.
Setup
First you have to download iMacMonitor.app on the “display” iMac and set it as Login Item.
Then make sure that a user is automatically logged in (see this link).
Restart
Voilà
Now you can connect a Thunderbolt enabled Mac and the “display” iMac will switch to Target Display Mode automatically.
Sourcecode
As I have written this application for fun you can also download the Xcode project. It’s released under the MIT licence.


 In the need for a simple and easy to use OS X based Always On VPN solution? If so, I may have something for you.